
最近用 iced 框架實作了一個吉他指板視覺化工具,可以顯示 C 大調音階、繪製弦和琴格,並在點擊音符時播放逼真的撥弦音效。這個專案雖然不大,但涵蓋了多個實用的 Rust 程式設計概念。
專案概述
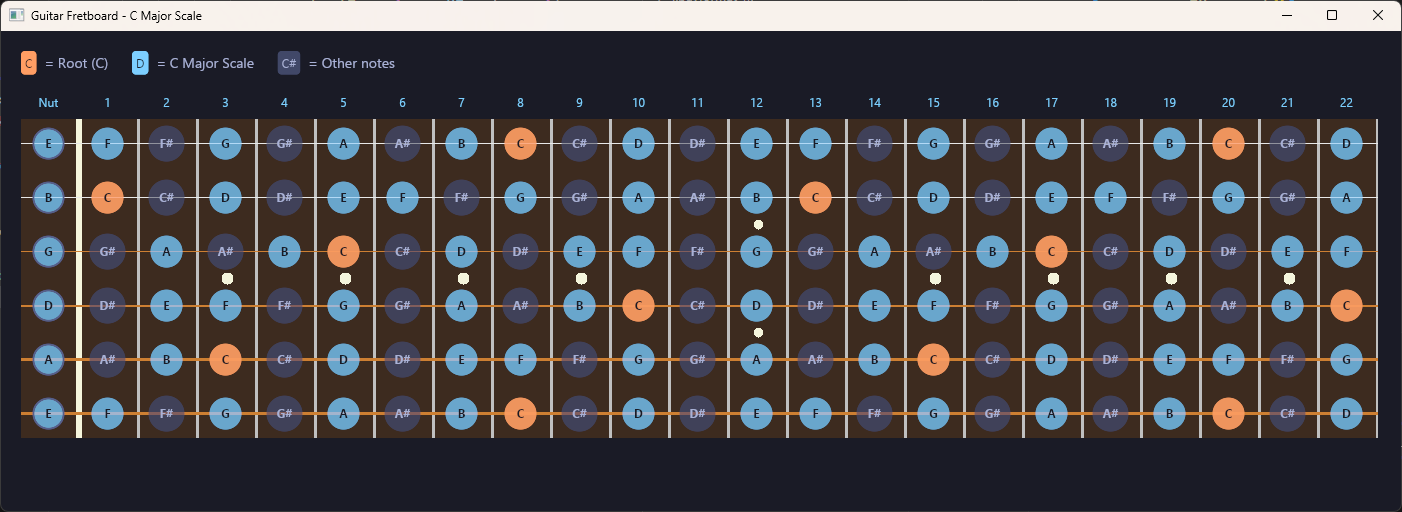
這個吉他指板視覺化工具的功能:
- 顯示標準調弦(E A D G B E)的 22 格指板
- 以不同顏色標示 C 大調音階音符
- 使用 Canvas 繪製琴弦、琴格和位置標記
- 點擊音符播放 Karplus-Strong 合成的撥弦音效
- 半透明音符圓圈,讓底層指板隱約可見
1. The Elm Architecture(TEA)
iced 框架採用 The Elm Architecture,這是一種函數式 UI 架構。整個應用只需要三個核心元素:
struct App {
    _output_stream: Option<OutputStream>,
    stream_handle: Option<rodio::OutputStreamHandle>,
}

#[derive(Debug, Clone)]
enum Message {
    NoteClicked(usize, usize), // (string_index, fret)
}

impl App {
    fn update(&mut self, message: Message) {
        match message {
            Message::NoteClicked(string_idx, fret) => {
                self.play_note(string_idx, fret);
            }
        }
    }

    fn view(&self) -> Element<'_, Message> {
        // 建構 UI 樹
    }
}
TEA 的三個核心:
- Model(
Appstruct):應用程式的狀態 - Message(
Messageenum):所有可能的使用者互動事件 - Update + View:
update根據 Message 更新狀態,view根據狀態產生 UI
這種架構的好處是單向資料流——狀態變更只透過 Message 觸發,UI 是狀態的純函數,讓程式邏輯容易理解和除錯。
2. 實作 Trait 來整合外部框架
這個專案大量使用了 Rust 的 trait 系統來與兩個外部框架(iced 和 rodio)整合。
Canvas 繪圖:實作 canvas::Program
iced 的 Canvas widget 要求實作 canvas::Program trait 來自定義繪圖邏輯:
struct FretboardCanvas;

impl canvas::Program<Message> for FretboardCanvas {
    type State = ();

    fn draw(
        &self,
        _state: &Self::State,
        renderer: &Renderer,
        _theme: &Theme,
        bounds: Rectangle,
        _cursor: iced::mouse::Cursor,
    ) -> Vec<canvas::Geometry<Renderer>> {
        let mut frame = canvas::Frame::new(renderer, bounds.size());

        // 繪製指板背景(木頭色)
        frame.fill_rectangle(
            Point::new(fretboard_x, fretboard_y),
            Size::new(fretboard_width, fretboard_height),
            canvas::Fill::from(iced::Color::from_rgb8(0x3d, 0x2b, 0x1f)),
        );

        // 繪製琴格(銀色垂直線)
        for fret in 1..NUM_FRETS {
            let x = fretboard_x + (fret as f32 + 1.0) * FRET_WIDTH - 2.0;
            frame.fill_rectangle(
                Point::new(x, fretboard_y),
                Size::new(3.0, fretboard_height),
                canvas::Fill::from(iced::Color::from_rgb8(0xc0, 0xc0, 0xc0)),
            );
        }

        // 繪製弦(粗細和顏色依弦種不同)
        let string_thicknesses = [3.0, 2.5, 2.0, 1.5, 1.2, 1.0];

        vec![frame.into_geometry()]
    }
}
這裡展示了 trait 的強大之處——只要實作 draw 方法,就能在 iced 的 Canvas 上繪製任意圖形。FretboardCanvas 是一個 zero-sized type(ZST),不佔任何記憶體,純粹作為 trait 實作的載體。
音訊來源:實作 Iterator + Source
rodio 的音訊播放需要實作兩個 trait:
impl Iterator for KarplusStrong {
    type Item = f32;

    fn next(&mut self) -> Option<f32> {
        if self.samples_remaining == 0 {
            return None;
        }
        self.samples_remaining -= 1;

        let current = self.buffer[self.index];

        // 低通濾波器:與下一個取樣值取平均
        let next_idx = (self.index + 1) % self.buffer.len();
        let filtered = (current + self.buffer[next_idx]) * 0.5 * self.decay;

        self.buffer[self.index] = filtered;
        self.index = (self.index + 1) % self.buffer.len();

        Some(current)
    }
}

impl Source for KarplusStrong {
    fn current_frame_len(&self) -> Option<usize> { None }
    fn channels(&self) -> u16 { 1 }
    fn sample_rate(&self) -> u32 { self.sample_rate }
    fn total_duration(&self) -> Option<Duration> { None }
}
關鍵觀念:
Iterator提供逐一產生取樣值的能力Source描述音訊格式(取樣率、聲道數等)- 兩者結合後,rodio 就能播放自訂的音訊來源
3. Karplus-Strong 撥弦合成
這是本專案最有趣的部分——用物理建模合成法模擬吉他撥弦聲。
struct KarplusStrong {
    buffer: Vec<f32>,         // 環形延遲緩衝區
    index: usize,             // 目前在緩衝區中的位置
    sample_rate: u32,
    samples_remaining: usize, // 持續時間控制
    decay: f32,               // 衰減因子
}

impl KarplusStrong {
    fn new(frequency: f32, duration_ms: u64) -> Self {
        let sample_rate = 44100u32;
        let delay_samples = (sample_rate as f32 / frequency).round() as usize;
        let total_samples = (sample_rate as u64 * duration_ms / 1000) as usize;

        // 用白噪音填充緩衝區(模擬撥弦的初始能量)
        let mut rng = rand::thread_rng();
        let buffer: Vec<f32> = (0..delay_samples)
            .map(|_| rng.gen::<f32>() * 2.0 - 1.0)
            .collect();

        Self {
            buffer,
            index: 0,
            sample_rate,
            samples_remaining: total_samples,
            decay: 0.999,
        }
    }
}
演算法的核心概念:
- 延遲緩衝區長度決定音高:
delay_samples = sample_rate / frequency,例如 440Hz 的 A 音需要44100 / 440 = 100個取樣 - 白噪音初始化:隨機值模擬撥弦時弦的不規則振動
- 低通濾波回饋:每次取出一個值後,與下一個值取平均再放回,模擬弦的能量自然衰減
- decay 參數:控制聲音持續的長度,0.999 接近電吉他的效果
這個演算法展示了 Rust 在數值運算上的優勢——沒有 GC 暫停,每個取樣都能在確定的時間內計算完成,非常適合即時音訊處理。
4. Stack:UI 圖層疊加
指板的視覺效果需要將 Canvas(繪製弦和琴格)與按鈕(互動音符)疊加在一起。iced 的 stack! macro 正好解決這個問題:
fn view_fretboard(&self) -> Element<'_, Message> {
    let fretboard_canvas: Canvas<FretboardCanvas, Message, Theme, Renderer> =
        canvas(FretboardCanvas)
            .width(canvas_width as u16)
            .height(canvas_height as u16);

    // Canvas 在底層,按鈕在上層
    stack![fretboard_canvas, buttons_layer]
        .width(Length::Fill)
        .height(canvas_height as u16)
        .into()
}
stack! 的行為類似 CSS 的 position: absolute——後面的元素疊加在前面的元素上方。搭配半透明的按鈕背景,可以讓底層的指板圖案隱約可見:
let (bg_color, text_color) = if is_root {
    (iced::Color::from_rgba8(0xff, 0x9e, 0x64, 0.85), color!(0x1a1b26))
} else if is_c_major {
    (iced::Color::from_rgba8(0x7d, 0xcf, 0xff, 0.60), color!(0x1a1b26))
} else {
    (iced::Color::from_rgba8(0x41, 0x48, 0x68, 0.70), color!(0xa9b1d6))
};
5. 閉包與按鈕樣式
每個音符按鈕都有自定義樣式,根據音符類型(根音、音階內、其他)和互動狀態(一般、hover)顯示不同顏色:
let style = move |_theme: &Theme, status: button::Status| {
    let bg = match status {
        button::Status::Hovered | button::Status::Pressed => {
            if is_root {
                iced::Color::from_rgba8(0xff, 0xb3, 0x80, 0.95)
            } else if is_c_major {
                iced::Color::from_rgba8(0x9d, 0xd6, 0xff, 0.80)
            } else {
                iced::Color::from_rgba8(0x56, 0x5f, 0x89, 0.85)
            }
        }
        _ => bg_color,
    };

    button::Style {
        background: Some(bg.into()),
        text_color,
        border: iced::Border {
            radius: (circle_size / 2.0).into(), // 圓形按鈕
            ..Default::default()
        },
        ..button::Style::default()
    }
};
這裡的重點:
move閉包:將is_root、is_c_major、bg_color等變數的所有權移入閉包border.radius做圓形:設定 radius 為直徑的一半,矩形按鈕變成圓形- 多層條件判斷:根音 > 音階音 > 其他音,優先級清晰
6. 常數與領域知識的編碼
將音樂理論編碼為 Rust 常數,讓程式碼自文件化(self-documenting):
const CHROMATIC_NOTES: [&str; 12] =
    ["C", "C#", "D", "D#", "E", "F", "F#", "G", "G#", "A", "A#", "B"];
const C_MAJOR_SCALE: [&str; 7] = ["C", "D", "E", "F", "G", "A", "B"];

// 標準調弦的 MIDI 音符編號
const OPEN_STRING_MIDI: [u8; 6] = [40, 45, 50, 55, 59, 64];

fn midi_to_frequency(midi_note: u8) -> f32 {
    440.0 * 2.0_f32.powf((midi_note as f32 - 69.0) / 12.0)
}

fn get_note_name(string_idx: usize, fret: usize) -> String {
    let midi_note = OPEN_STRING_MIDI[string_idx] + fret as u8;
    let note_idx = (midi_note % 12) as usize;
    CHROMATIC_NOTES[note_idx].to_string()
}
這段程式碼展示了幾個 Rust 的特色:
- 固定大小陣列
[&str; 12]:編譯時確定大小,存取時有邊界檢查 - MIDI 音高公式:
440 * 2^((n - 69) / 12)是標準的十二平均律公式 - 取餘數做循環:
midi_note % 12將任何 MIDI 編號映射回 0-11 的音名索引
7. 所有權與音訊資源管理
音訊播放涉及作業系統資源,Rust 的所有權系統自然地處理了生命週期:
struct App {
    _output_stream: Option<OutputStream>,      // 必須持有,否則音訊會停止
    stream_handle: Option<rodio::OutputStreamHandle>,  // 用來建立 Sink
}

impl Default for App {
    fn default() -> Self {
        let (stream, handle) = OutputStream::try_default().ok().unzip();
        Self {
            _output_stream: stream,
            stream_handle: handle,
        }
    }
}
幾個關鍵細節:
_output_stream的底線前綴:表示這個欄位不會被直接使用,但必須保持存活,因為它代表與音訊驅動程式的連接。一旦被 drop,所有音訊都會停止Option包裝:音訊初始化可能失敗(例如沒有音訊裝置),用Option優雅處理ok().unzip():將Result<(A, B)>轉換為(Option<A>, Option<B>),一行解決錯誤處理
總結
這個吉他指板專案涵蓋了多個重要的 Rust 概念:
| 概念 | 應用場景 |
|---|---|
| TEA 架構 | iced 應用的 Model-Message-Update-View |
| Trait 實作 | canvas::Program 和 Source |
| Iterator | Karplus-Strong 音訊取樣產生 |
| 閉包 + move | 按鈕樣式與事件處理 |
| 所有權 | 音訊資源的生命週期管理 |
| 常數陣列 | 音樂理論的領域知識編碼 |
| Stack 佈局 | Canvas 與互動元件的疊加 |
| 物理建模 | 即時音訊合成 |
如果你想找一個結合 GUI、音訊和數學的 Rust 練習專案,吉他指板是個很好的選擇。從簡單的視覺化開始,逐步加入音訊合成、Canvas 繪圖、半透明效果,每一步都能學到新的 Rust 技巧。
參考資源
- guitar-fretboard 原始碼 - 本文範例的完整程式碼
- iced 官方網站 - Rust 跨平台 GUI 框架
- rodio - Rust 音訊播放函式庫
- Karplus-Strong 演算法 - 物理建模弦樂合成